

Ableton Live for Live Performance
Learn how to organize, prepare, rehearse, and run a reliable Ableton Live setup for live performance.

Ableton Live works well on stage when the Live Set is treated as a performance system rather than a studio project opened at a venue. The reliable approach is to choose how the show will be operated, organize the Set around that decision, plan the outputs and controls, and test the complete system before the show.
Live supports traditional linear arrangement, flexible Session View performance, effects, external hardware, and MIDI control. That flexibility is useful in playback, but only when the important actions are easy to understand and repeat. Ableton describes Live as software for music creation and performance.
Choose the performance model first
Ableton’s two main performance models serve different kinds of playback shows:
| Model | Best when | Trade-off |
|---|---|---|
| Arrangement View | Song order, timing, transitions, and playback are fixed; other systems depend on precise timing. | Clear and repeatable, but less flexible during the show. |
| Session View | Sections may change, material is launched manually, or the operator needs clips and scenes in a visual grid. | More flexible, but requires stricter naming, color-coding, launch behavior, and control. |
| Hybrid | Flexible scenes suit some material while a fixed timeline handles precise songs or transitions. | Requires a clear operating plan across both views. |
Ableton’s Session View manual explains clip and scene launching, while the Arrangement View manual covers the linear timeline. Choose based on four questions: Does the song need a fixed sequence? Who advances it? Can the operator change the form safely? Do lighting, video, or timecode depend on exact timing?
Organize the Set for operation
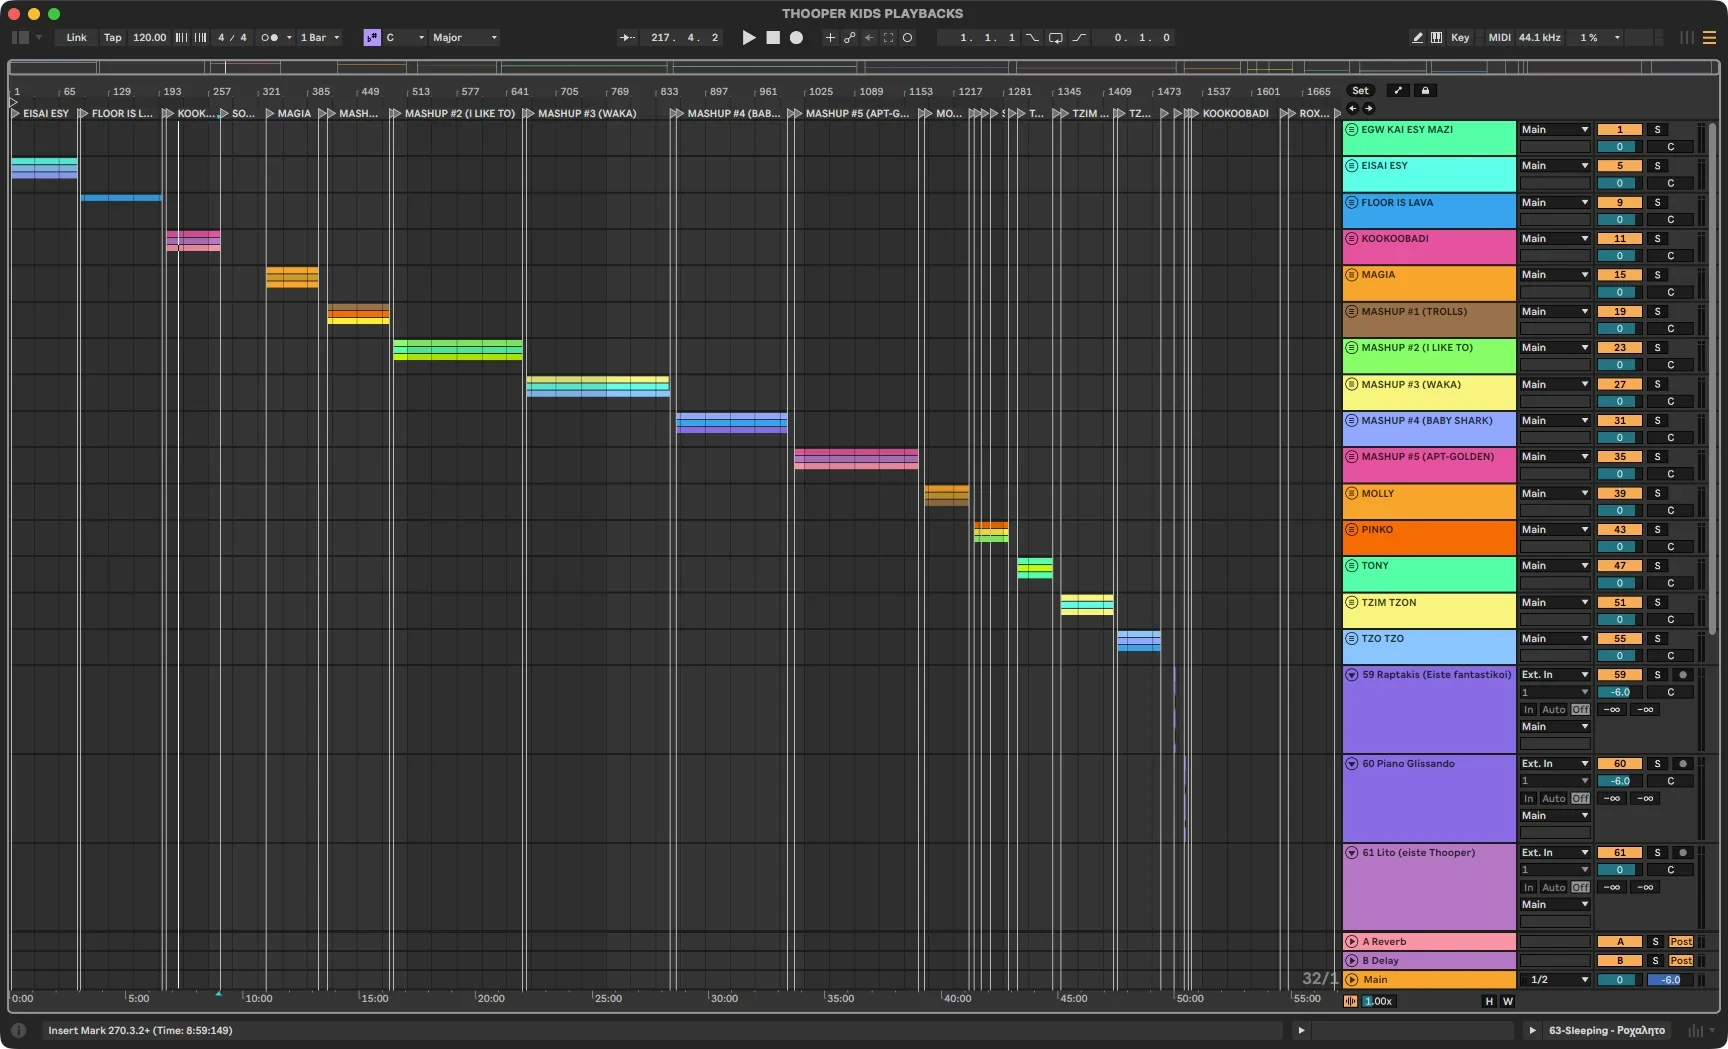
A live Set should not be an archive of every take, experiment, and plugin used during production. Organize it around the decisions someone must make on stage:
| Role | What to define |
|---|---|
| Audio stems | Which songs, sections, and playback roles do they belong to? |
| Playback | Is the show using a stereo mix, grouped stems, or selected backing parts? |
| Click and cues | Who hears them, and when do they start and stop? |
| Control | Which actions need MIDI mapping, automation, or a marker? |
| Outputs | What goes to monitors, front of house, or another show system? |
Use names that are useful under pressure—“Song 03 — Chorus Playback” is clearer than “Audio 17.” Apply the same naming and color conventions across the show, and remove or isolate studio-only material.
Before rehearsal, list the actual destinations: a stereo playback feed or grouped music stems, separate music/vocal/click/cue outputs, and any show-control or timecode signals. There is no universal output layout; assign each signal a destination, label it, document who should hear it, and test it with the same interface and connections planned for the show.
Use control only where it reduces risk
MIDI mapping, automation, markers, and external controllers can reduce manual work, but they also create dependencies that must be documented and rehearsed. Prioritize controls for starting or stopping playback, moving to the next song or section, changing the active playback state, muting or enabling a signal, and returning the system to a known state.
Map only actions that reduce real workload. Every additional control is another thing to label, test, and recover when something changes; test important controls from the position where they will actually be used.
Where SetStage fits
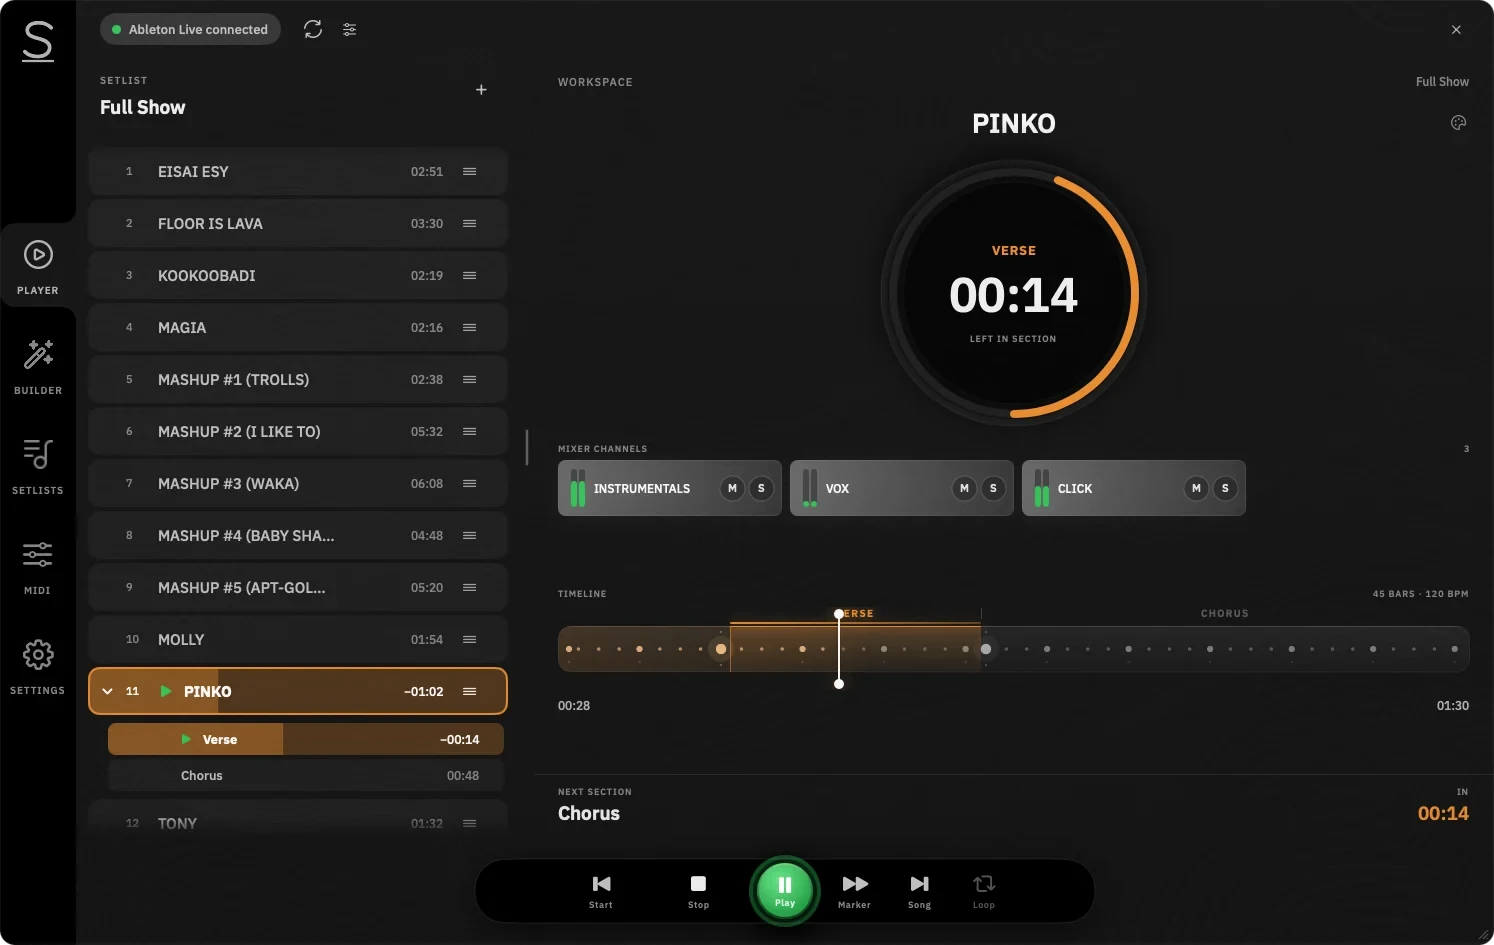
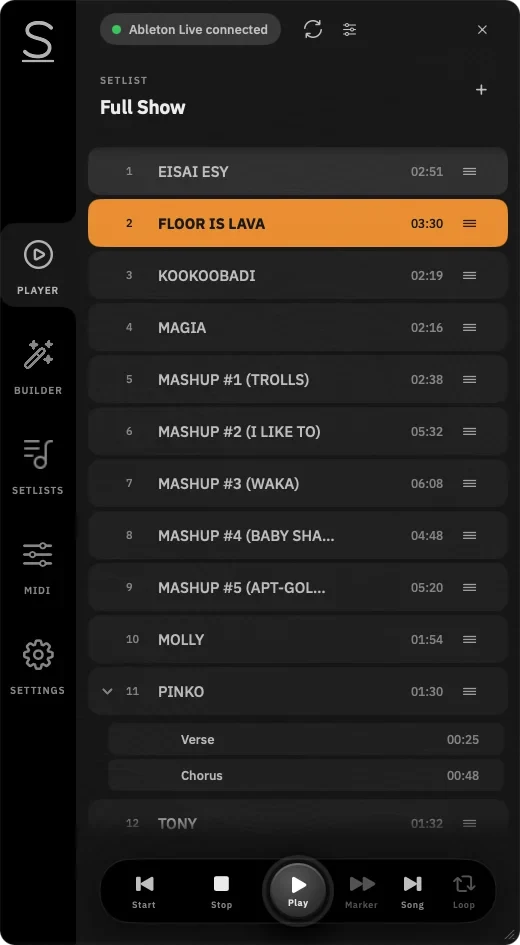
Once the show structure, outputs, and controls are clear, the next challenge may be operating the Ableton show repeatedly. SetStage is a native macOS show-management layer for Ableton Live that handles setlists, song navigation, markers, playback, and show control while Ableton handles the audio.
SetStage is most relevant when a production needs a clearer operating layer for:
- song navigation and setlist management;
- markers and locators;
- playback control;
- show control and MIDI control;
- multiple Ableton systems over a network; or
- rehearsal and redundant playback workflows for larger shows.
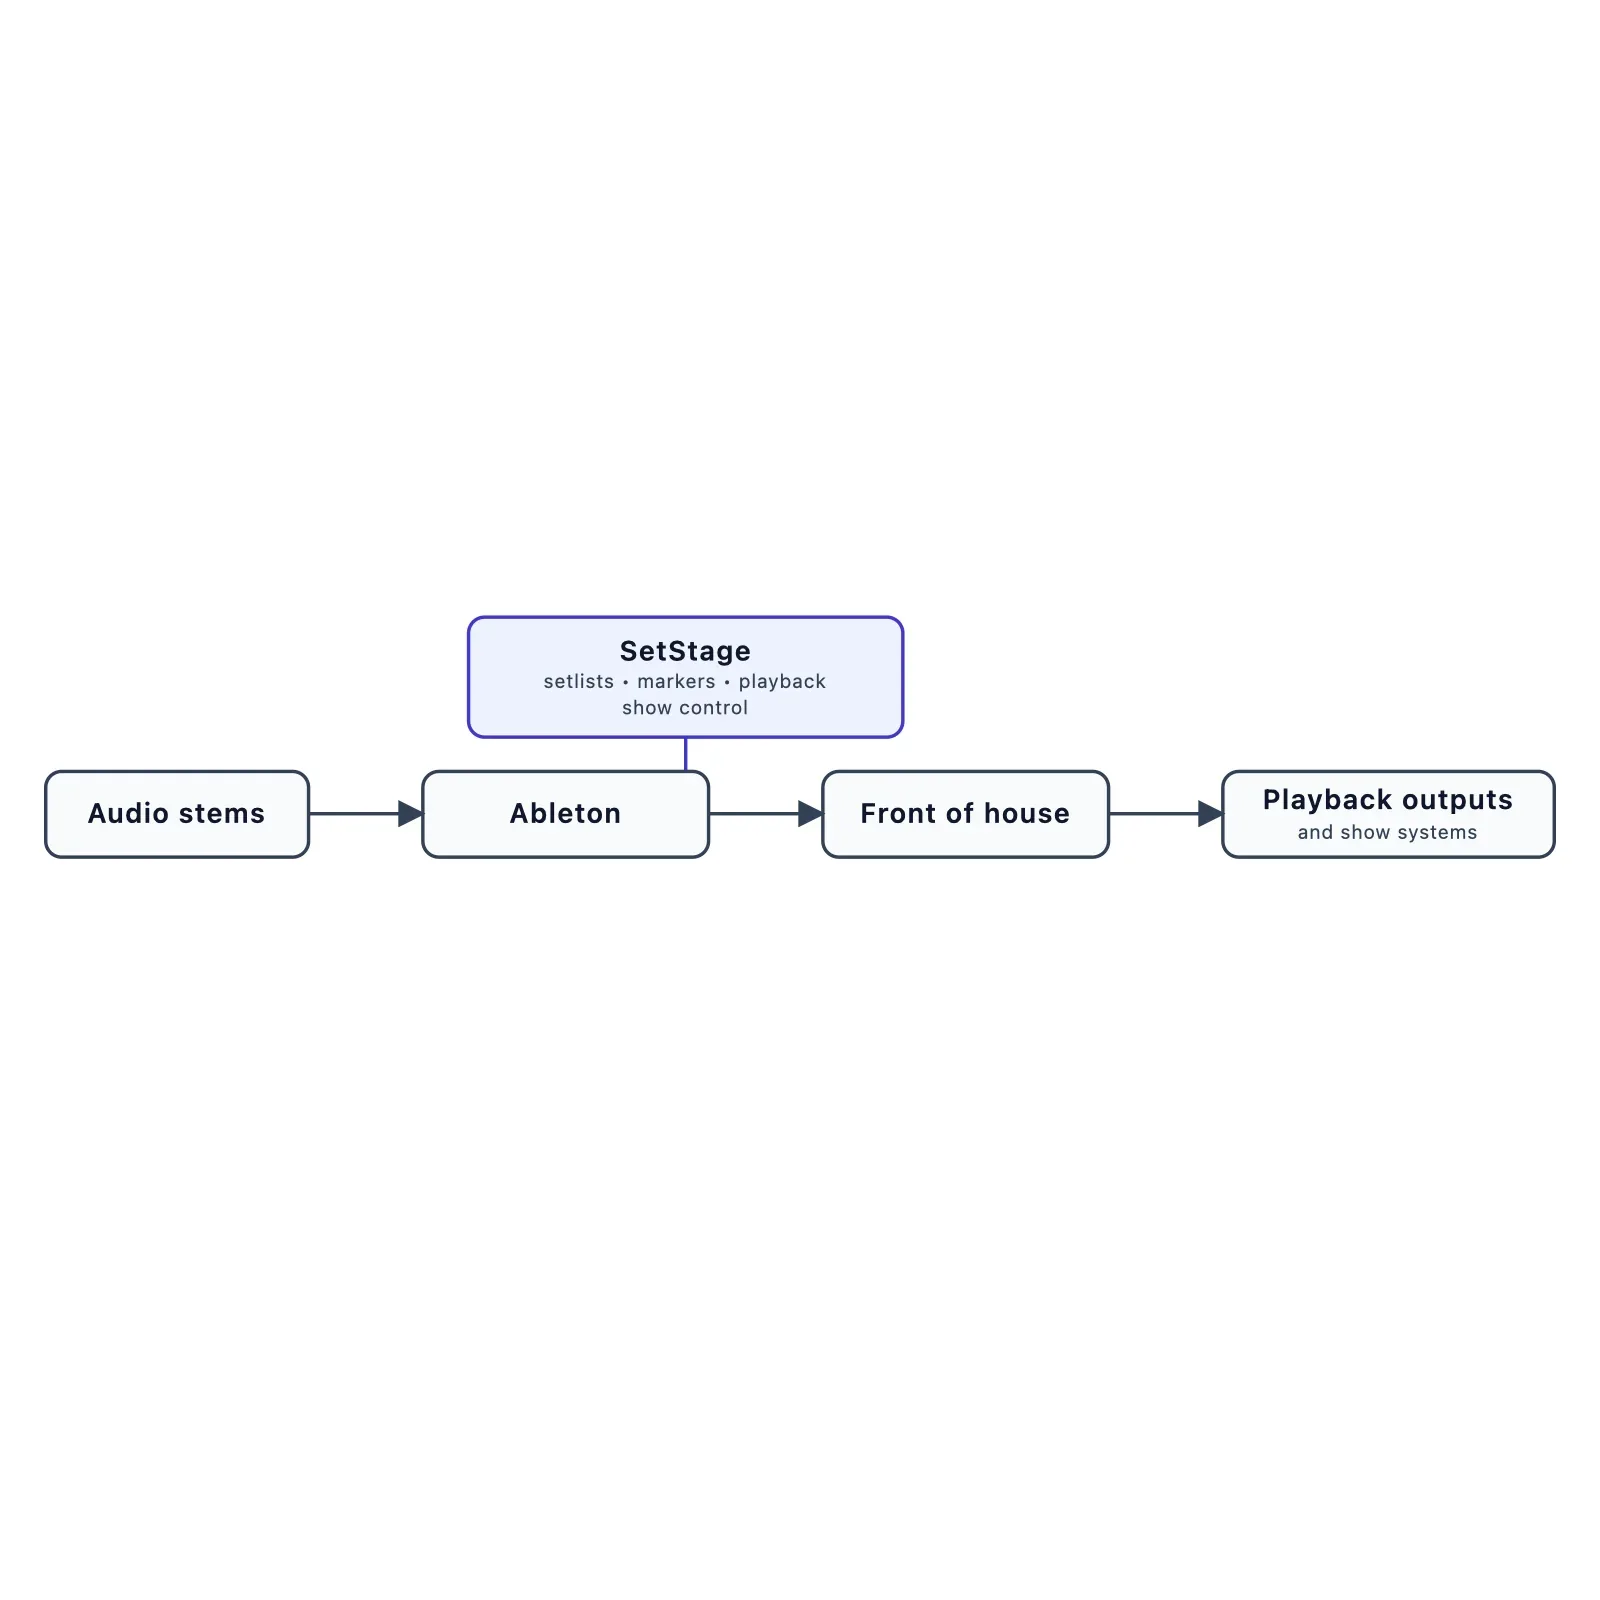
SetStage does not process or output audio. Audio stems are arranged, routed, and played in Ableton. SetStage communicates with and controls Ableton, so the operator can control songs, sections, markers, playback, and show operation without moving the audio path out of Ableton.
SetStage can also stop a song automatically after it reaches a designated marker—for example, a SONG END marker. That gives each song a defined stopping point and removes the need for the operator to stop playback manually at the end of the song.
How SetStage fits around Ableton Live
Audio stems are arranged and routed in Ableton, while SetStage provides the setlist, marker, playback, and show-management layer for the Ableton-based show.
Keep latency and CPU under control
The correct buffer setting is not a universal number. A larger buffer generally gives the computer more processing time but increases the delay between an input and the resulting sound. A smaller buffer can feel more immediate but leaves less processing headroom and can increase the risk of crackles or dropouts.
Test with the actual computer, interface, plugins, and the most demanding song in the show. Play the parts that will run simultaneously, check playback timing and monitoring, watch for CPU spikes, and leave headroom for real performance conditions. Ableton’s latency guidance and dropout guidance provide the technical baseline.
Do not optimize only the easiest song. Run the complete show from start to finish after the main processing and routing decisions are final.
Rehearse the system, not only the songs
Use the same software version, computer, interface, show-control devices, and connections that will be used on stage. Then rehearse the way the show will actually be operated.
- Open the exact show version and confirm the required devices.
- Check the first song, first transition, and final song.
- Run every song and transition without stopping to repair details.
- Test operator controls from their real positions.
- Check the actual outputs with the people who need to hear them.
- Practice recovery from a missed trigger or unavailable controller.
- Save a known-good version and preserve a backup.
The goal is not to pretend that failures cannot happen. It is to make the response understandable before the audience is present.
Ableton Live performance checklist
- Correct show version identified and backed up.
- Songs, sections, scenes, and markers named consistently.
- Unused studio material removed or isolated.
- Playback and show-control devices tested from their operating positions.
- Playback, click, cues, monitoring, and front-of-house outputs documented.
- Audio interface and MIDI devices tested.
- Most demanding song tested with the complete processing chain.
- CPU, latency, plugin behavior, and dropouts checked.
- Controls and transitions rehearsed.
- Known-good backup available to the operator.
Final thoughts
The best Ableton live setup is not the one with the most tracks or cleverest controls. It is the one that makes the show’s important decisions visible, repeatable, and recoverable.
Choose the performance model first. Keep the Set understandable. Plan the outputs before rehearsal, use control only where it reduces workload, and test the full system at realistic demand. If the show has grown beyond a small Set operated by one person, SetStage is designed for the show-management part of that workflow.
SetStage
Need a clearer way to operate a multi-song Ableton playback show? SetStage provides a setlist, marker, playback, MIDI, and show-control layer around Ableton, including automatic song stopping at a SONG END marker, while Ableton handles the audio.